So what have i been up to recently? Well quite a lot actually. I have been making various boxes of all different shapes and sizes to hold candle tealights not to mention chocolates etc etc. well i will show you all those another day, because today i just have to share my latest creation........an advent calendar for my coffee addict daughter'
Step 1
Cut piece of card 6 1/2" x 8"
Cut paper 2 1/4 x 5 and 2 1/2 x 3
Step 2
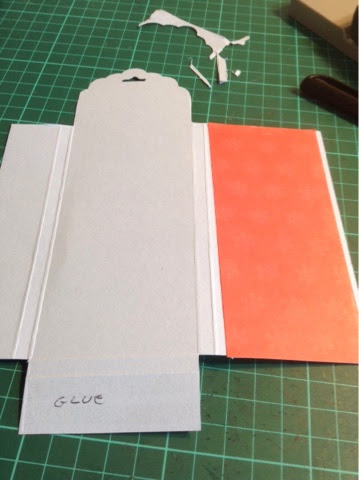
Score card on short side at 1", 1 1/4", 3 3/4" and 4"
Scorecard on long side at 3/4'. 1" and 6",but only score the 6" mark across the first two and last two areas
Step 3
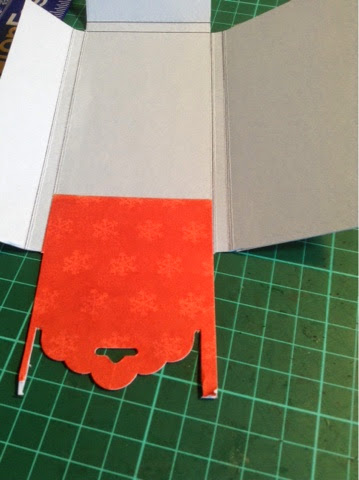
Stick down the patterned paper as shown in the next pictures.
Step 5
Glue the bottom of your tag box, as shown in photo as well as tape the long length, as shown, and stick down, omce again as shown in the photo.
Step 6
Now to decorate! I used the coffee mug from Stampin' up perfect blend stamp set.
Stamp once on brown card, the band onto patterned paper and rhe lid onto white card. Rather than wastea lot of patterned paper i stamp onto scrap paper. Place my piece of paper over the band, line up the stamp and stamp over the scrap paper.
Having stamped the mug, cut out and sponge the edges with your ink so that there are no white edges showing. Stick down theband and lift the mug top with dimensionals.
Then using dimensionals stick pot onto tag at a rakish angle! I decorated it with a petite petal punch out and a pearl
Step 7
For the advent numbers i printed them out using a word processor app on my ipad, cut out using the 1" circle punch and then punched out 1 1/4" colour card circle to match my tag. Stuck he number onto the larger circle using a dimensional.
The ribbon, i took a small piece of ribbon and crossed it over itself, then stapled it into place (a piece of card on the back makes your stapler behave!). I stuck the ribbon to the tag using. Double sided tape.
I then used silicone glue to stick my number on top ofthe ribbon.
Step 8
Thread matching ribbon through top of tag and tie it using some string or other twineetc. Mine is actually gargen string from a garden centre, filtched from the shed!
Step 9
Finally all you have to do is insert your coffee sachet and make anoher 25 of these!
Hope you enjoy his tutorial and it makes sense. Please tell me if it doesn't!


