
Tuesday, 30 June 2015
Let your dreams take flight
I have been asked to run a workshop for our local Tuesday club. As there are men and ladies, ranging in ages from 60's up to 100, i thought that this card might be a good one to do with them.
Monday, 29 June 2015
Tote bag and 4x4 cards
Here i have cased a bag tutorial that i found on youtube known as tge hallet bag.
This was made to fit a selection of matching 4x4 cards and envelopes in.
Saturday, 27 June 2015
Two brothers cuddle each other

So our boys are now five years old. Sometimes they act all grown up and others they forget ab
Nd revert back to kittenhood!
Then of course its the big fit of who gets to be the one laying on top of me. Well on this occassion they decided if they cuddled each other then they could both be on me!
Friday, 26 June 2015
Welcome to Stampin Up!
Well i have today made a leap of faith, i have signed up to be a Stampin Up demonstrator. Hopefully i can actually manage to make it work and actually make some money making cards and selling the items i use.
So watch this space!
Saturday, 28 March 2015
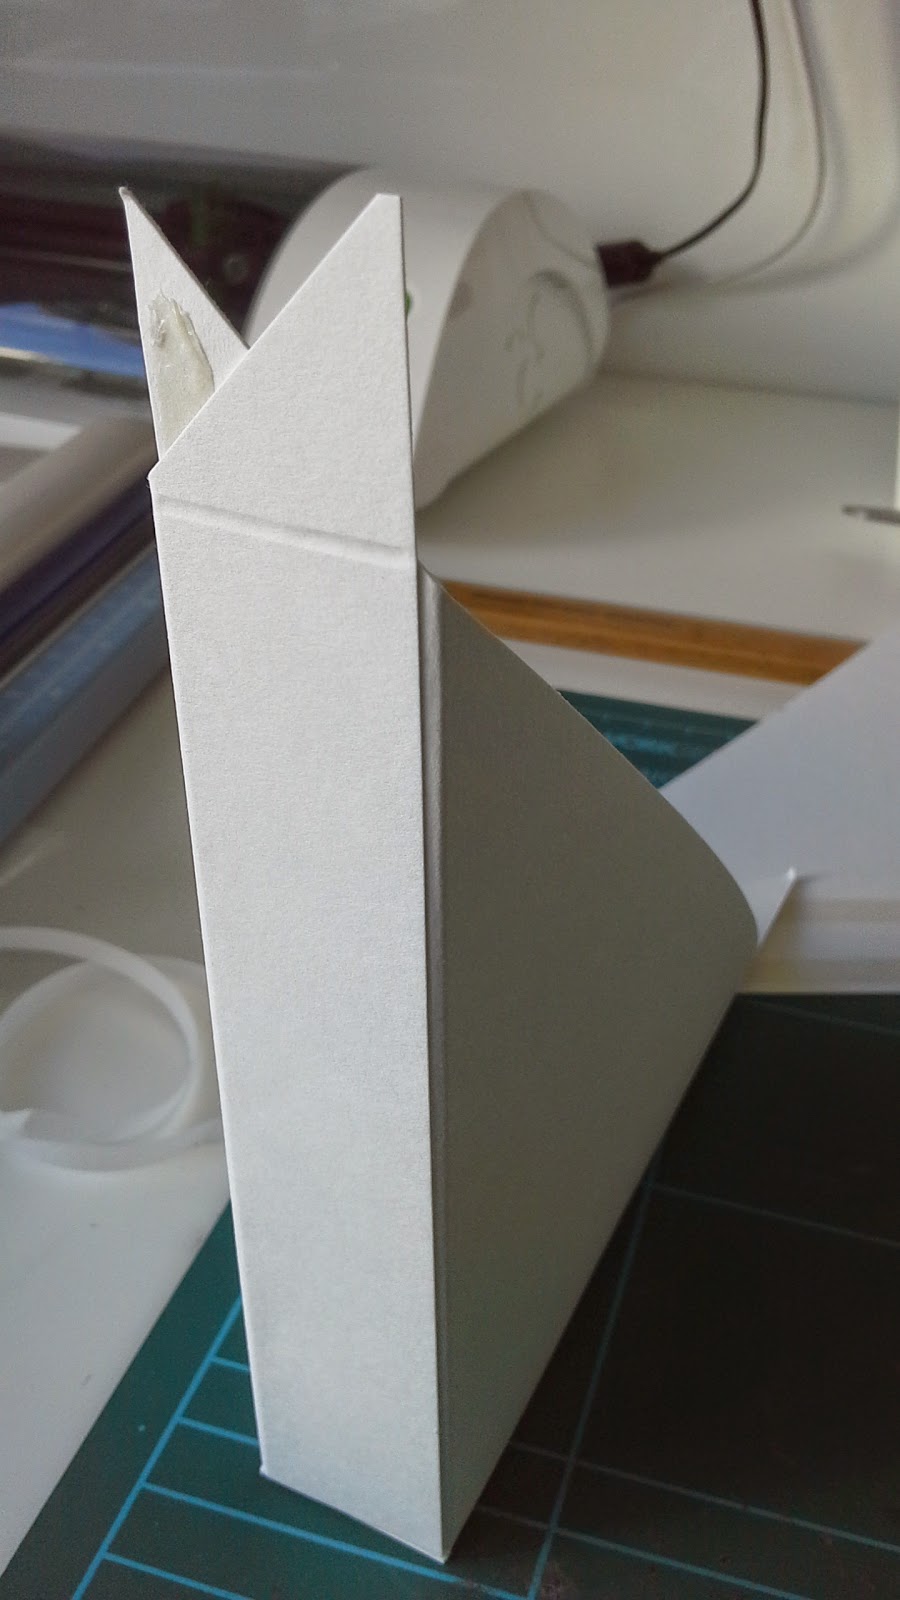
Triangular closure box
These measurements will make a box finished size 5 x 5 x1.
Cut 2 card pieces 7 x7 inch.
score both at 1" and 6" on both sides, then cut across diagonal to make 4 triangles.
cut the squares from two of the triangles and notch the squares on the other triangles as per the pictures below.
- Glue or tape side on the triangles with the squares removed and tape together with the notched triangles.
- remove the "V" from the triangles but leave one, this will become the hinge joining the two boxes.
You now have the basic closure box, it can be decorated using either squares circles etc


Friday, 21 November 2014
Advent calendar for coffee lovers!
Well its been a good while since i last posted here. What excuses can i give? I guess none that would be valid, so i won't bother!


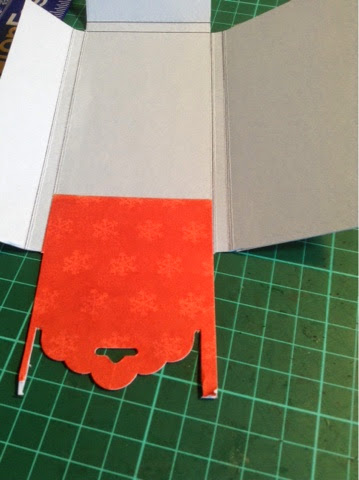

Step 5


So what have i been up to recently? Well quite a lot actually. I have been making various boxes of all different shapes and sizes to hold candle tealights not to mention chocolates etc etc. well i will show you all those another day, because today i just have to share my latest creation........an advent calendar for my coffee addict daughter'
Step 1
Cut piece of card 6 1/2" x 8"
Cut paper 2 1/4 x 5 and 2 1/2 x 3
Step 2
Score card on short side at 1", 1 1/4", 3 3/4" and 4"
Scorecard on long side at 3/4'. 1" and 6",but only score the 6" mark across the first two and last two areas
Step 3
Stick down the patterned paper as shown in the next pictures.
Step 4
Using your tag punch line up the longer part of your card and punch out. As yourpunch is only 2" wide you will need to tidy the sides at this point.
Glue the bottom of your tag box, as shown in photo as well as tape the long length, as shown, and stick down, omce again as shown in the photo.
Step 6
Now to decorate! I used the coffee mug from Stampin' up perfect blend stamp set.
Stamp once on brown card, the band onto patterned paper and rhe lid onto white card. Rather than wastea lot of patterned paper i stamp onto scrap paper. Place my piece of paper over the band, line up the stamp and stamp over the scrap paper.
Having stamped the mug, cut out and sponge the edges with your ink so that there are no white edges showing. Stick down theband and lift the mug top with dimensionals.
Then using dimensionals stick pot onto tag at a rakish angle! I decorated it with a petite petal punch out and a pearl
Step 7
For the advent numbers i printed them out using a word processor app on my ipad, cut out using the 1" circle punch and then punched out 1 1/4" colour card circle to match my tag. Stuck he number onto the larger circle using a dimensional.
The ribbon, i took a small piece of ribbon and crossed it over itself, then stapled it into place (a piece of card on the back makes your stapler behave!). I stuck the ribbon to the tag using. Double sided tape.
I then used silicone glue to stick my number on top ofthe ribbon.
Step 8
Thread matching ribbon through top of tag and tie it using some string or other twineetc. Mine is actually gargen string from a garden centre, filtched from the shed!
Step 9
Finally all you have to do is insert your coffee sachet and make anoher 25 of these!
Hope you enjoy his tutorial and it makes sense. Please tell me if it doesn't!
Thursday, 10 July 2014
Paint walls not pictures

My hubby had to rewire the bungalow so that resulted in the whole place being ripped apart and every room having to be redecorated.
Kitchen now finished and small bedroom and hall. Sitting room nearly completed, but we need to level the extension floor before putting the remainder of the laminate down. Still can at least see it all coming together.

Subscribe to:
Posts (Atom)